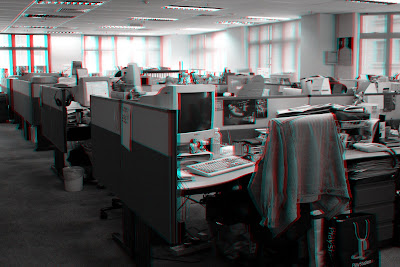
 What you see above is a 3D image taken with my camera a while back. This shot is actually a combination of two shots I took, one slight moved to one side of the other. Merged in Photoshop with some adjustments and you get this.
NB: To see it in 3D you need a pair of red/blue 3D glasses (some comics and 3D DVDs comes with one -- Spy Kids 3D comes to mind)-- make sure the red filter is over your left eye and blue filter over your right (some 3D glasses reverse this) and enjoy!
I did this a while back and I often forget how to do it again in Photoshop, so here is the text of an article I wrote a few years back so I can easily find it again on this blog when I need it:
- First, open both images in Photoshop, taking note which one is your left image and which one is the right.
- Start with image that you want to be on the left and then, in the Layers menu floating on the right of your screen, click on the Channels tab.
- In the Channels tab, you’ll see four different channels, RGB, Red, Green and Blue. Click on the Red channel to select it.
- Next, right-click and choose “Duplicate channel” — a pop-up menu will open when you do this.
- In the pop-up menu, under Destination/Document, click on the drop down menu and choose New. When you do this, a new drop down menu option will become available for you to name the new file. Name it anything you want, say “3DPix.”
- Now go to the second picture, the image which should be on the right and again click on the Channels tab.
- This time, however, select the Green channel, right-click on it and then select Duplicate Channel again. This time, in the Destination/ Document drop-down menu, choose the document you just created for the left image — in this case, the destination should be “3DPix.”
- Do this again, but this time right-click on the Blue channel, with the destination document again going to “3DPix.” Now click on the newly created 3DPix. It should still look like it’s in Black and White.
- To turn it back into colour, click on the Image menu at the top of the screen and go to Mode/RGB Colour and your picture should now be in colour with all the correct red and blue information.
- If you’ve done things correctly, then all you need is to save it and view it with the glasses.
- If however, your red and blue images are too far apart in the final image, you can use the Move tool and nudge the Red channel using the arrow keys so that the red and blue images are not spaced too far apart from each other.
- Also, when taking pictures, try not to have any large red or blue areas in the picture, otherwise they will look funny when you convert them.
- In fact, if you want the best effect, you might want to turn the picture into black and white images first.
- To do this, click on Image/Adjustments/Desaturate — this turns the images into black and white images (but with the colour information still intact) and then work on the images like before.
No comments:
Post a Comment